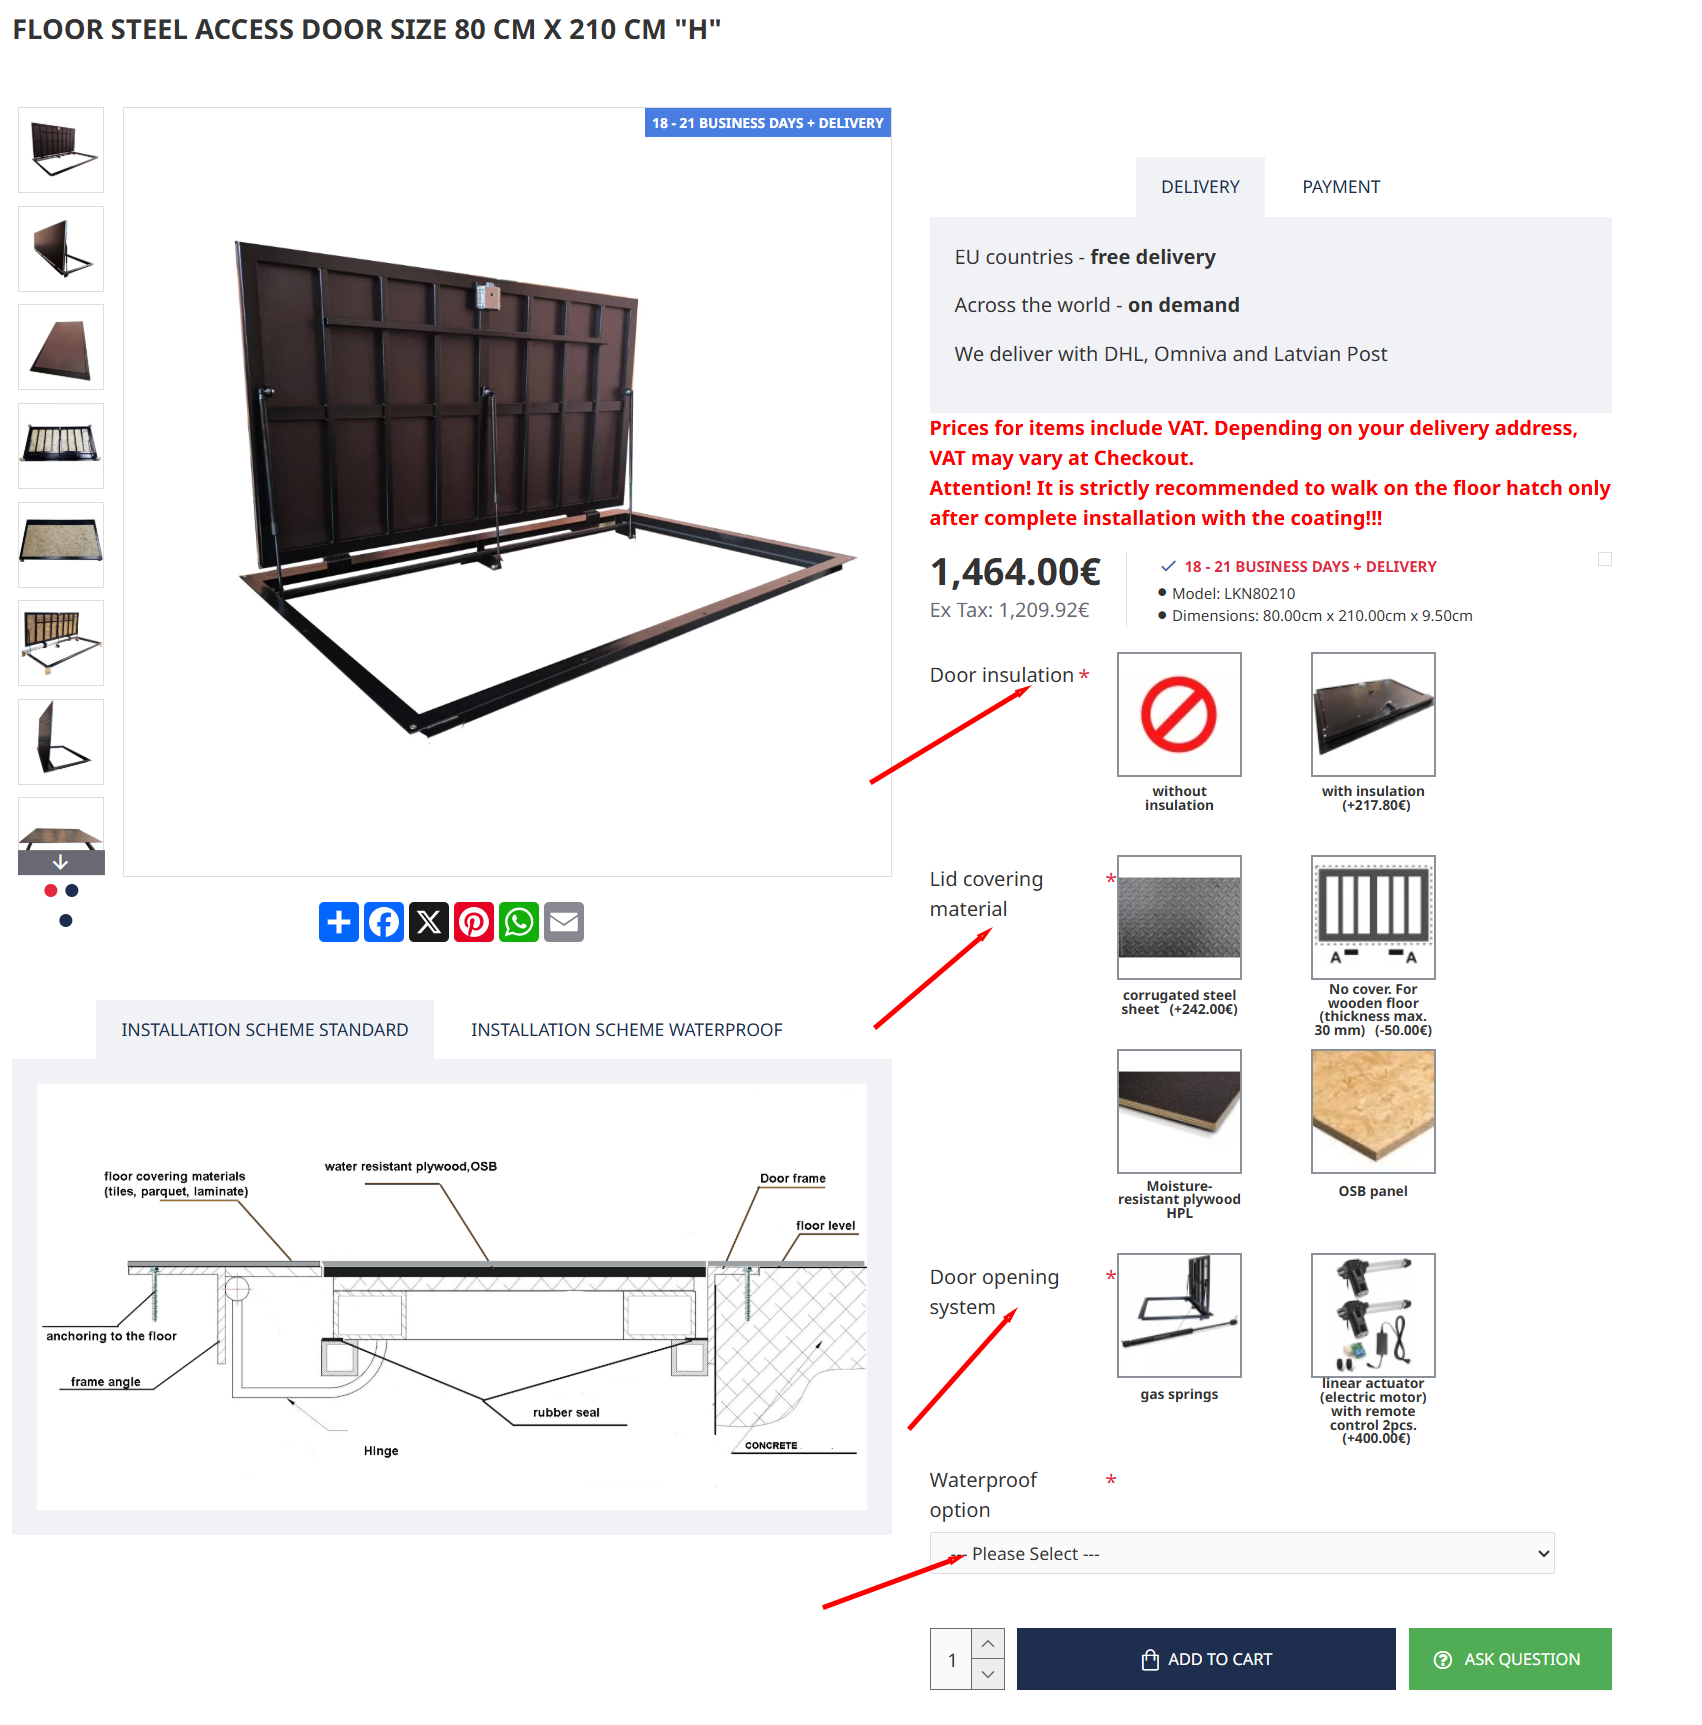
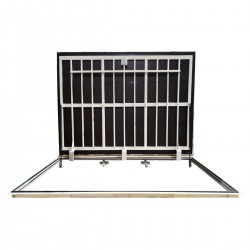
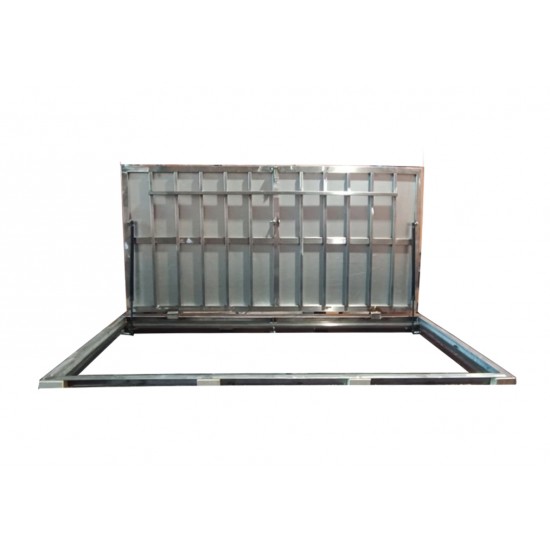
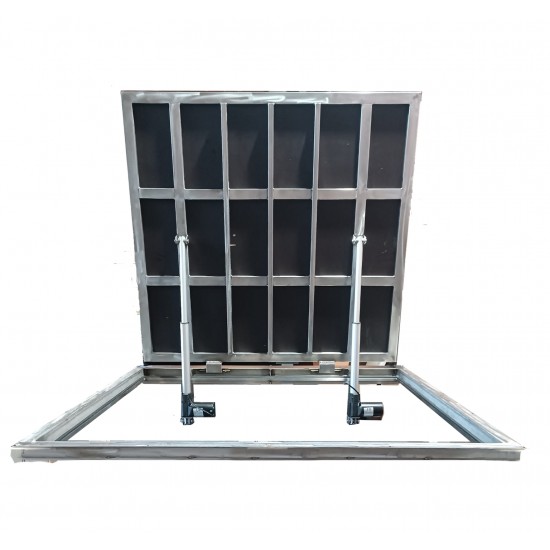
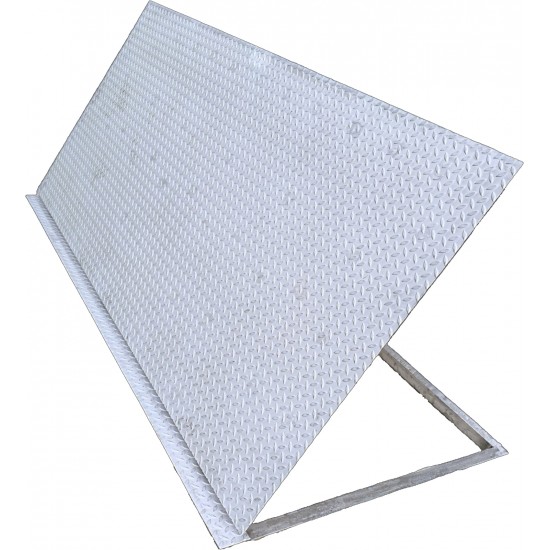
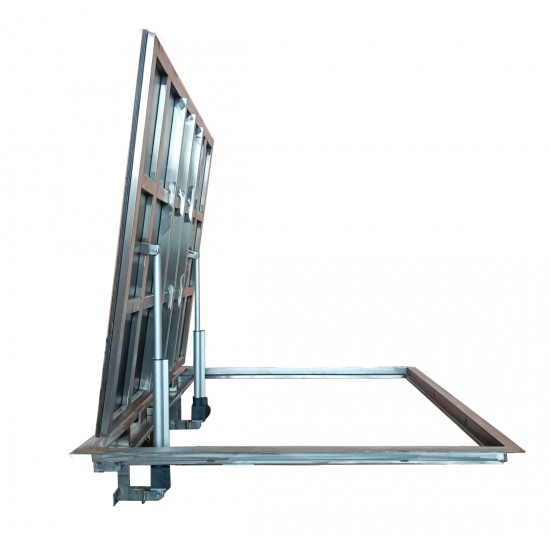
Stainless steel floor access door 100 cm x 230 cm "H" for indoor and outdoor


EU countries - free delivery
Across the world - on demand
We deliver with DHL, Omniva and Latvian Post
Payment


Prices for items include VAT. Depending on your delivery address, VAT may vary at Checkout.
Attention! It is strictly recommended to walk on the floor hatch only after complete installation with the coating!!!
- Availability: 18 - 21 b. days + delivery
- Model: LKN100230AISI
- Dimensions: 230.00cm x 100.00cm x 9.50cm
Available Options
| Dimensions | |
| Depth | 9,5cm |
| Door size (w x h) | 94cm x 228 cm |
| Mounting height | 230 cm |
| Mounting width | 100 cm |
| Overall height | 237 cm |
| Overall width | 107 cm |
| Weight | 110 kg |
Stainless steel floor access door 100 cm x 230 cm "H" for indoor and outdoor
Stainless Steel Floor Access Door for Outdoor & Harsh Environments
A stainless steel floor access door is a heavy-duty, corrosion-resistant entry point designed for outdoor and high-moisture applications. Its robust construction ensures durability in extreme weather, UV exposure, and constant water contact—making it ideal for:
✔ Swimming pool decks (drain covers, equipment hatches)
✔ Utility vaults (electrical, telecom, water)
✔ Industrial sites & marine environments
✔ Parking garages & public walkways
Key Features for Durability & Safety
1. Door Lid Material Options
-
Stainless Steel (304/316) – Best for corrosion resistance in pools, coastal areas, and chemical-heavy zones.
-
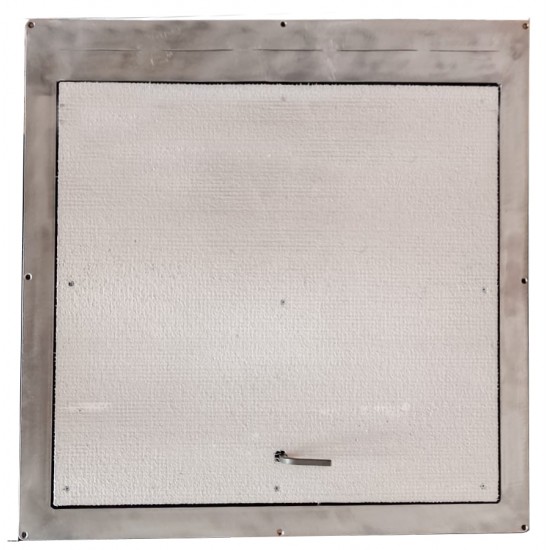
Stainless Steel Corrugated Metal Sheet – Adds rigidity and slip resistance; ideal for high-traffic areas.
-
Water-Resistant Plywood (Marine-Grade) – A lightweight, cost-effective option when lined with waterproof coatings (e.g., epoxy or fiberglass).
2. Weatherproof & Secure Design
-
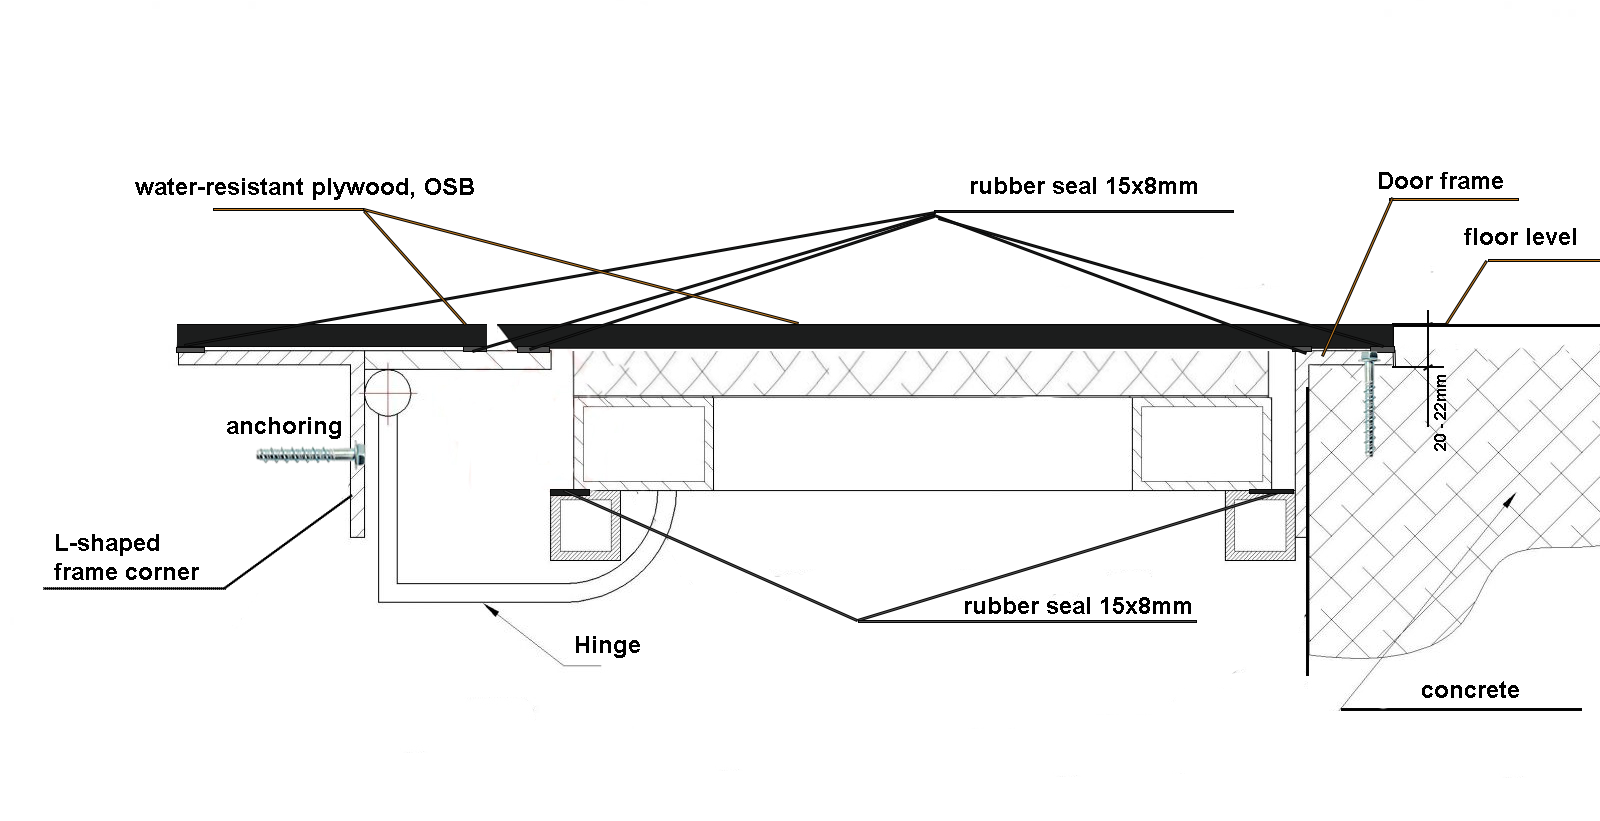
Watertight seals/gaskets prevent leaks in pool decks or flood-prone zones.
-
Anti-slip surfaces (textured steel or grit-coated finishes) for wet areas.
-
Tamper-proof locks (internal hinges, padlock hasps, or keyed bolts).
3. Structural Strength
-
Supports pedestrian or vehicular loads (varies by model).
-
Reinforced frames prevent warping under pressure.
4. Low-Profile & Customizable
-
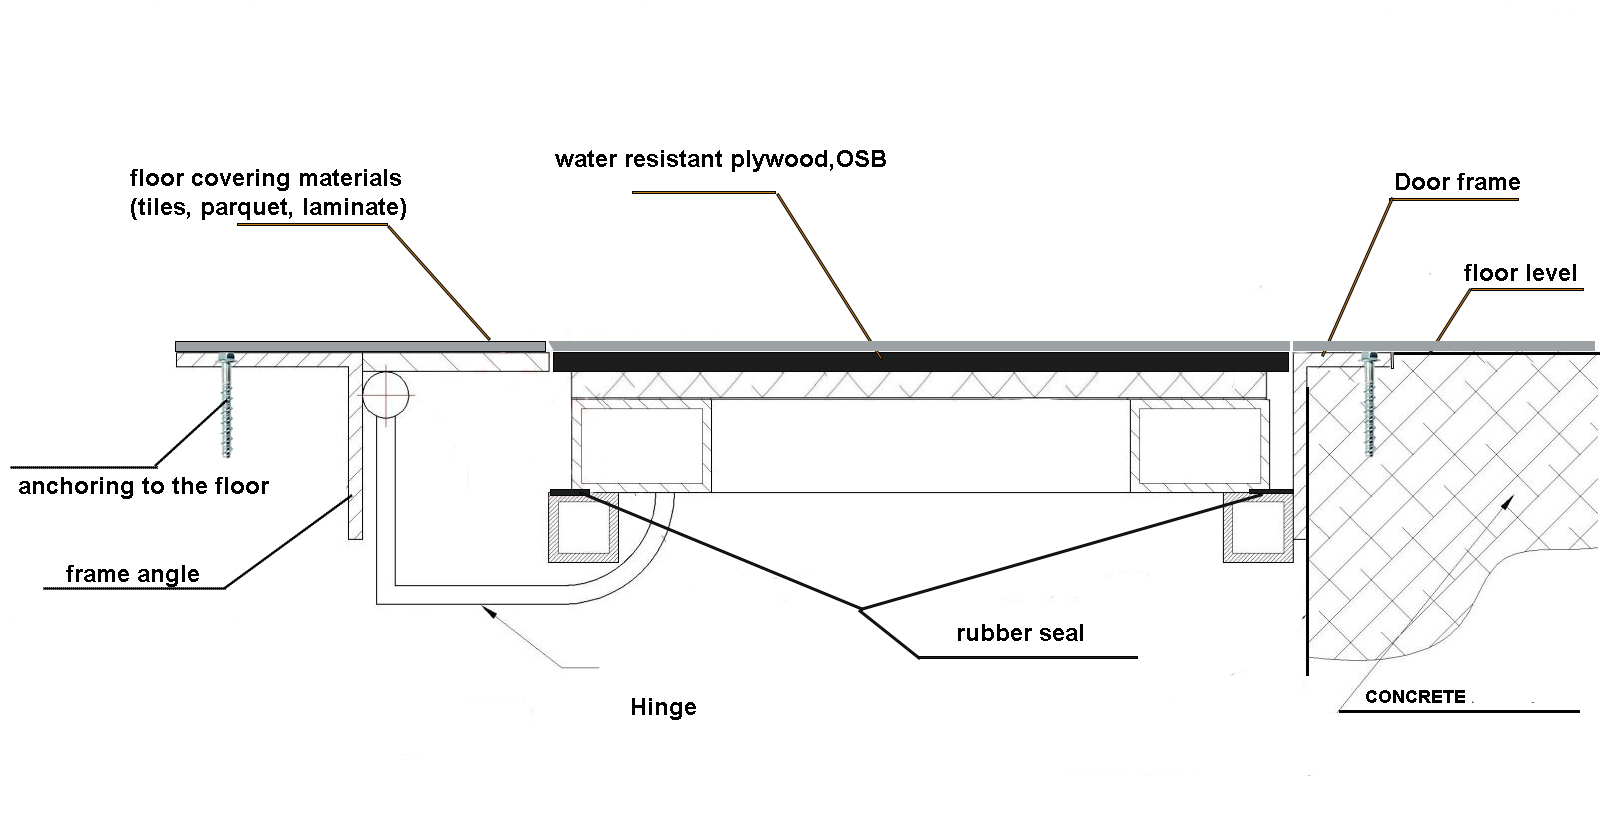
Flush-mounted for seamless blending with tiles, concrete, or decking.
-
Optional gas struts for easy lifting.
Why Stainless Steel for Pool Areas?
-
Chlorine & saltwater resistant (unlike carbon steel or aluminum).
-
Hygienic & easy to sanitize—critical for public pools.
-
Zero rust, zero rot (unlike wood or coated alternatives).
Installation & Upkeep
-
Anchors into concrete, pavers, or steel structures.
-
Maintenance: Rinse periodically; check seals and hinges.
Privacy Policy
Last updated: March 31, 2020
This Privacy Policy describes Our policies and procedures on the collection, use and disclosure of Your information when You use the Service and tells You about Your privacy rights and how the law protects You.
We use Your Personal data to provide and improve the Service. By using the Service, You agree to the collection and use of information in accordance with this Privacy Policy.
Interpretation and Definitions
Interpretation
The words of which the initial letter is capitalized have meanings defined under the following conditions.
The following definitions shall have the same meaning regardless of whether they appear in singular or in plural.
Definitions
For the purposes of this Privacy Policy:
-
You means the individual accessing or using the Service, or the company, or other legal entity on behalf of which such individual is accessing or using the Service, as applicable.
-
Company (referred to as either "the Company", "We", "Us" or "Our" in this Agreement) refers to Ritone LLC, Riga, Dammes street 26 - 64, LV-1069.
- Affiliate means an entity that controls, is controlled by or is under common control with a party, where "control" means ownership of 50% or more of the shares, equity interest or other securities entitled to vote for election of directors or other managing authority.
- Account means a unique account created for You to access our Service or parts of our Service.
- Website refers to LUKONS, accessible from https://lukons.com/
- Service refers to the Website.
- Country refers to: Latvia
-
Service Provider means any natural or legal person who processes the data on behalf of the Company. It refers to third-party companies or individuals employed by the Company to facilitate the Service, to provide the Service on behalf of the Company, to perform services related to the Service or to assist the Company in analyzing how the Service is used.
- Third-party Social Media Service refers to any website or any social network website through which a User can log in or create an account to use the Service.
-
Personal Data is any information that relates to an identified or identifiable individual.
- Cookies are small files that are placed on Your computer, mobile device or any other device by a website, containing the details of Your browsing history on that website among its many uses.
- Usage Data refers to data collected automatically, either generated by the use of the Service or from the Service infrastructure itself (for example, the duration of a page visit).
Collecting and Using Your Personal Data
Types of Data Collected
Personal Data
While using Our Service, We may ask You to provide Us with certain personally identifiable information that can be used to contact or identify You. Personally identifiable information may include, but is not limited to:
- Email address
- First name and last name
- Phone number
- Address, State, Province, ZIP/Postal code, City
- Usage Data
Usage Data
Usage Data is collected automatically when using the Service.
Usage Data may include information such as Your Device's Internet Protocol address (e.g. IP address), browser type, browser version, the pages of our Service that You visit, the time and date of Your visit, the time spent on those pages, unique device identifiers and other diagnostic data.
When You access the Service by or through a mobile device, We may collect certain information automatically, including, but not limited to, the type of mobile device You use, Your mobile device unique ID, the IP address of Your mobile device, Your mobile operating system, the type of mobile Internet browser You use, unique device identifiers and other diagnostic data.
We may also collect information that Your browser sends whenever You visit our Service or when You access the Service by or through a mobile device.
Tracking Technologies and Cookies
We use Cookies and similar tracking technologies to track the activity on Our Service and store certain information. Tracking technologies used are beacons, tags, and scripts to collect and track information and to improve and analyze Our Service.
You can instruct Your browser to refuse all Cookies or to indicate when a Cookie is being sent. However, if You do not accept Cookies, You may not be able to use some parts of our Service.
Cookies can be "Persistent" or "Session" Cookies. Persistent Cookies remain on your personal computer or mobile device when You go offline, while Session Cookies are deleted as soon as You close your web browser. Learn more about cookies in the "What Are Cookies" article.
We use both session and persistent Cookies for the purposes set out below:
-
Necessary / Essential Cookies
Type: Session Cookies
Administered by: Us
Purpose: These Cookies are essential to provide You with services available through the Website and to enable You to use some of its features. They help to authenticate users and prevent fraudulent use of user accounts. Without these Cookies, the services that You have asked for cannot be provided, and We only use these Cookies to provide You with those services.
-
Cookies Policy / Notice Acceptance Cookies
Type: Persistent Cookies
Administered by: Us
Purpose: These Cookies identify if users have accepted the use of cookies on the Website.
-
Functionality Cookies
Type: Persistent Cookies
Administered by: Us
Purpose: These Cookies allow us to remember choices You make when You use the Website, such as remembering your login details or language preference. The purpose of these Cookies is to provide You with a more personal experience and to avoid You having to re-enter your preferences every time You use the Website.
For more information about the cookies we use and your choices regarding cookies, please visit our Cookies Policy.
Use of Your Personal Data
The Company may use Personal Data for the following purposes:
- To provide and maintain our Service, including to monitor the usage of our Service.
- To manage Your Account: to manage Your registration as a user of the Service. The Personal Data You provide can give You access to different functionalities of the Service that are available to You as a registered user.
- For the performance of a contract: the development, compliance and undertaking of the purchase contract for the products, items or services You have purchased or of any other contract with Us through the Service.
- To contact You: To contact You by email, telephone calls, SMS, or other equivalent forms of electronic communication, such as a mobile application's push notifications regarding updates or informative communications related to the functionalities, products or contracted services, including the security updates, when necessary or reasonable for their implementation.
- To provide You with news, special offers and general information about other goods, services and events which we offer that are similar to those that you have already purchased or enquired about unless You have opted not to receive such information.
- To manage Your requests: To attend and manage Your requests to Us.
We may share your personal information in the following situations:
- With Service Providers: We may share Your personal information with Service Providers to monitor and analyze the use of our Service, to show advertisements to You to help support and maintain Our Service, to contact You, to advertise on third party websites to You after You visited our Service or for payment processing.
- For Business transfers: We may share or transfer Your personal information in connection with, or during negotiations of, any merger, sale of Company assets, financing, or acquisition of all or a portion of our business to another company.
- With Affiliates: We may share Your information with Our affiliates, in which case we will require those affiliates to honor this Privacy Policy. Affiliates include Our parent company and any other subsidiaries, joint venture partners or other companies that We control or that are under common control with Us.
- With Business partners: We may share Your information with Our business partners to offer You certain products, services or promotions.
- With other users: when You share personal information or otherwise interact in the public areas with other users, such information may be viewed by all users and may be publicly distributed outside. If You interact with other users or register through a Third-Party Social Media Service, Your contacts on the Third-Party Social Media Service may see You name, profile, pictures and description of Your activity. Similarly, other users will be able to view descriptions of Your activity, communicate with You and view Your profile.
Retention of Your Personal Data
The Company will retain Your Personal Data only for as long as is necessary for the purposes set out in this Privacy Policy. We will retain and use Your Personal Data to the extent necessary to comply with our legal obligations (for example, if we are required to retain your data to comply with applicable laws), resolve disputes, and enforce our legal agreements and policies.
The Company will also retain Usage Data for internal analysis purposes. Usage Data is generally retained for a shorter period of time, except when this data is used to strengthen the security or to improve the functionality of Our Service, or We are legally obligated to retain this data for longer time periods.
Transfer of Your Personal Data
Your information, including Personal Data, is processed at the Company's operating offices and in any other places where the parties involved in the processing are located. It means that this information may be transferred to — and maintained on — computers located outside of Your state, province, country or other governmental jurisdiction where the data protection laws may differ than those from Your jurisdiction.
Your consent to this Privacy Policy followed by Your submission of such information represents Your agreement to that transfer.
The Company will take all steps reasonably necessary to ensure that Your data is treated securely and in accordance with this Privacy Policy and no transfer of Your Personal Data will take place to an organization or a country unless there are adequate controls in place including the security of Your data and other personal information.
Disclosure of Your Personal Data
Business Transactions
If the Company is involved in a merger, acquisition or asset sale, Your Personal Data may be transferred. We will provide notice before Your Personal Data is transferred and becomes subject to a different Privacy Policy.
Law enforcement
Under certain circumstances, the Company may be required to disclose Your Personal Data if required to do so by law or in response to valid requests by public authorities (e.g. a court or a government agency).
Other legal requirements
The Company may disclose Your Personal Data in the good faith belief that such action is necessary to:
- Comply with a legal obligation
- Protect and defend the rights or property of the Company
- Prevent or investigate possible wrongdoing in connection with the Service
- Protect the personal safety of Users of the Service or the public
- Protect against legal liability
Security of Your Personal Data
The security of Your Personal Data is important to Us, but remember that no method of transmission over the Internet, or method of electronic storage is 100% secure. While We strive to use commercially acceptable means to protect Your Personal Data, We cannot guarantee its absolute security.
Children's Privacy
Our Service does not address anyone under the age of 13. We do not knowingly collect personally identifiable information from anyone under the age of 13. If You are a parent or guardian and You are aware that Your child has provided Us with Personal Data, please contact Us. If We become aware that We have collected Personal Data from anyone under the age of 13 without verification of parental consent, We take steps to remove that information from Our servers.
We also may limit how We collect, use, and store some of the information of Users between 13 and 18 years old. In some cases, this means We will be unable to provide certain functionality of the Service to these users.
If We need to rely on consent as a legal basis for processing Your information and Your country requires consent from a parent, We may require Your parent's consent before We collect and use that information.
Links to Other Websites
Our Service may contain links to other websites that are not operated by Us. If You click on a third party link, You will be directed to that third party's site. We strongly advise You to review the Privacy Policy of every site You visit.
We have no control over and assume no responsibility for the content, privacy policies or practices of any third party sites or services.
Changes to this Privacy Policy
We may update our Privacy Policy from time to time. We will notify You of any changes by posting the new Privacy Policy on this page.
We will let You know via email and/or a prominent notice on Our Service, prior to the change becoming effective and update the "Last updated" date at the top of this Privacy Policy.
You are advised to review this Privacy Policy periodically for any changes. Changes to this Privacy Policy are effective when they are posted on this page.
Contact Us
If you have any questions about this Privacy Policy, You can contact us:
- By email: info@lukons.com
Terms & Conditions
Welcome to LUKONS!
These terms and conditions outline the rules and regulations for the use of RITONE's Website, located at https://lukons.com/.
By accessing this website we assume you accept these terms and conditions. Do not continue to use LUKONS if you do not agree to take all of the terms and conditions stated on this page.
The following terminology applies to these Terms and Conditions, Privacy Statement and Disclaimer Notice and all Agreements: "Client", "You" and "Your" refers to you, the person log on this website and compliant to the Company’s terms and conditions. "The Company", "Ourselves", "We", "Our" and "Us", refers to our Company. "Party", "Parties", or "Us", refers to both the Client and ourselves. All terms refer to the offer, acceptance and consideration of payment necessary to undertake the process of our assistance to the Client in the most appropriate manner for the express purpose of meeting the Client’s needs in respect of provision of the Company’s stated services, in accordance with and subject to, prevailing law of Latvia. Any use of the above terminology or other words in the singular, plural, capitalization and/or he/she or they, are taken as interchangeable and therefore as referring to same.
Cookies
We employ the use of cookies. By accessing LUKONS, you agreed to use cookies in agreement with the RITONE's Privacy Policy.
Most interactive websites use cookies to let us retrieve the user’s details for each visit. Cookies are used by our website to enable the functionality of certain areas to make it easier for people visiting our website. Some of our affiliate/advertising partners may also use cookies.
License
Unless otherwise stated, RITONE and/or its licensors own the intellectual property rights for all material on LUKONS. All intellectual property rights are reserved. You may access this from LUKONS for your own personal use subjected to restrictions set in these terms and conditions.
You must not:
- Republish material from LUKONS
- Sell, rent or sub-license material from LUKONS
- Reproduce, duplicate or copy material from LUKONS
- Redistribute content from LUKONS
This Agreement shall begin on the date hereof.
Parts of this website offer an opportunity for users to post and exchange opinions and information in certain areas of the website. RITONE does not filter, edit, publish or review Comments prior to their presence on the website. Comments do not reflect the views and opinions of RITONE,its agents and/or affiliates. Comments reflect the views and opinions of the person who post their views and opinions. To the extent permitted by applicable laws, RITONE shall not be liable for the Comments or for any liability, damages or expenses caused and/or suffered as a result of any use of and/or posting of and/or appearance of the Comments on this website.
RITONE reserves the right to monitor all Comments and to remove any Comments which can be considered inappropriate, offensive or causes breach of these Terms and Conditions.
You warrant and represent that:
- You are entitled to post the Comments on our website and have all necessary licenses and consents to do so;
- The Comments do not invade any intellectual property right, including without limitation copyright, patent or trademark of any third party;
- The Comments do not contain any defamatory, libelous, offensive, indecent or otherwise unlawful material which is an invasion of privacy
- The Comments will not be used to solicit or promote business or custom or present commercial activities or unlawful activity.
You hereby grant RITONE a non-exclusive license to use, reproduce, edit and authorize others to use, reproduce and edit any of your Comments in any and all forms, formats or media.
Hyperlinking to our Content
The following organizations may link to our Website without prior written approval:
- Government agencies;
- Search engines;
- News organizations;
- Online directory distributors may link to our Website in the same manner as they hyperlink to the Websites of other listed businesses; and
- System wide Accredited Businesses except soliciting non-profit organizations, charity shopping malls, and charity fundraising groups which may not hyperlink to our Web site.
These organizations may link to our home page, to publications or to other Website information so long as the link: (a) is not in any way deceptive; (b) does not falsely imply sponsorship, endorsement or approval of the linking party and its products and/or services; and (c) fits within the context of the linking party’s site.
We may consider and approve other link requests from the following types of organizations:
- commonly-known consumer and/or business information sources;
- dot.com community sites;
- associations or other groups representing charities;
- online directory distributors;
- internet portals;
- accounting, law and consulting firms; and
- educational institutions and trade associations.
We will approve link requests from these organizations if we decide that: (a) the link would not make us look unfavorably to ourselves or to our accredited businesses; (b) the organization does not have any negative records with us; (c) the benefit to us from the visibility of the hyperlink compensates the absence of RITONE; and (d) the link is in the context of general resource information.
These organizations may link to our home page so long as the link: (a) is not in any way deceptive; (b) does not falsely imply sponsorship, endorsement or approval of the linking party and its products or services; and (c) fits within the context of the linking party’s site.
If you are one of the organizations listed in paragraph 2 above and are interested in linking to our website, you must inform us by sending an e-mail to RITONE. Please include your name, your organization name, contact information as well as the URL of your site, a list of any URLs from which you intend to link to our Website, and a list of the URLs on our site to which you would like to link. Wait 2-3 weeks for a response.
Approved organizations may hyperlink to our Website as follows:
- By use of our corporate name; or
- By use of the uniform resource locator being linked to; or
- By use of any other description of our Website being linked to that makes sense within the context and format of content on the linking party’s site.
No use of RITONE's logo or other artwork will be allowed for linking absent a trademark license agreement.
iFrames
Without prior approval and written permission, you may not create frames around our Webpages that alter in any way the visual presentation or appearance of our Website.
Content Liability
We shall not be hold responsible for any content that appears on your Website. You agree to protect and defend us against all claims that is rising on your Website. No link(s) should appear on any Website that may be interpreted as libelous, obscene or criminal, or which infringes, otherwise violates, or advocates the infringement or other violation of, any third party rights.
Your Privacy
Please read Privacy Policy
Reservation of Rights
We reserve the right to request that you remove all links or any particular link to our Website. You approve to immediately remove all links to our Website upon request. We also reserve the right to amen these terms and conditions and it’s linking policy at any time. By continuously linking to our Website, you agree to be bound to and follow these linking terms and conditions.
Removal of links from our website
If you find any link on our Website that is offensive for any reason, you are free to contact and inform us any moment. We will consider requests to remove links but we are not obligated to or so or to respond to you directly.
We do not ensure that the information on this website is correct, we do not warrant its completeness or accuracy; nor do we promise to ensure that the website remains available or that the material on the website is kept up to date.
Disclaimer
To the maximum extent permitted by applicable law, we exclude all representations, warranties and conditions relating to our website and the use of this website. Nothing in this disclaimer will:
- limit or exclude our or your liability for death or personal injury;
- limit or exclude our or your liability for fraud or fraudulent misrepresentation;
- limit any of our or your liabilities in any way that is not permitted under applicable law; or
- exclude any of our or your liabilities that may not be excluded under applicable law.
The limitations and prohibitions of liability set in this Section and elsewhere in this disclaimer: (a) are subject to the preceding paragraph; and (b) govern all liabilities arising under the disclaimer, including liabilities arising in contract, in tort and for breach of statutory duty.
As long as the website and the information and services on the website are provided free of charge, we will not be liable for any loss or damage of any nature.


